Thursday, August 23, 2007

Highlight Section by Bluring

In this tutorial, I will show you how to enhance your pictures by bringing out a focused selection of your image. We will do this thru adding a slight blur to the background.

Step 1. Open the image of your choice. Here is the picture I will be using.


Step 2. You need to duplicate the image. I like to do it twice so I can see the original and the enhanced. You will see what I mean once we are done. So I have duplicated twice, but you really only need to do it once.

Step 3. On your bottom layer, or middle layer (if you duplicated twice) go to filter > blur > and use the blur tool of your choice. I like the simple Gaussian blur, but the lens blur would work well too. If you hide the top layer, you should see your results. You don't want your blur to be too blurred because your subject will look way out of place. I used a Gaussian blur of 8.5. Here is what mine looks like.


Step 4. Unhide the top layer. Your picture so look like the original again. Add a layer mask making sure you are on the top layer. Fill the mask with black. You now should see the blurred picture again.


Step 5. Using the selection tool of your choice, make a selection of the part you want to be highlighted. In this case, I want my fiancee to be highlighted and I am going to leave the background blurred and highlight just her


Step 6. With your selection in place, switch your color to white. Make sure you select the mask and fill the selection with white.


Step 7. If you did your's like mine with three layers, you can group the top two layers together to see the difference. If you hide and unhide the group, you will see the original and your newly modified image.

Here is my final.

Thursday, July 26, 2007

Highlight a Picture with Color and Black and White


In this tutorial, I will show you how to make everything in an image black and white accept a few items. Here is an example.


Step 1. Open the image of your choice.


Step 2. Duplicate the background layer. You can do this by dragging the layer on top of the new layer icon in your layer pallet menu or under the layer menu click duplicate layer.


Step 3. Add a layer mask to the background copy layer and fill it with black.


Step 4. Using the tool of your choice, select the area you want to remain in color. I used the magic wand tool just because I am not looking for precision. Click on your layer mask an switch the paint to white. Using the paint bucket tool fill the selection in with white on the mask.


Step 5. Unlock the background layer by double clicking on it. Then desaturate the background layer shift + apple+ u (apple) or shift + control + u (windows) or under image -> adjustments -> desaturate.

Visit Our Mall

I found a very cool site called www.visitourmall.com that pays me a percentage of the sale for anything I buy online. They have stores like Target, Wal-Mart, Home Depot, etc. etc. etc. I think there are something like 500 stores total. It is completely free to do and anyone that shops in my mall, I get some cash back.

Click Here to Build Your Own Mall

Make Image Pop Out of a Picture

In this tutorial, I will show you how to make a section of an image appear to pop out of a picture.


There are several way to do this, but I have found the easiest, for me at least, is this way.

Step 1. Open the image of your choice. Here is the image I will be using.


Step 2. Create a new layer on top of the background layer. You can do this a couple of ways, but the quickest is to click to “new layer” button next to the trash can on your layer pallet.

Step 3. Using the rectangular marquee tool, make a selection on the new layer similar to mine.


Step 4. Fill the selection with white.

Step 5. We need to get rid of the excess white, so go to select -> modify -> contract and contract by 15-30 pixels. I have gone with 30, but my original image is of higher resolution.

Step 6. Deselect the layer by pressing apple + d (apple) or control + d (windows). Then go to edit -> transform -> perspective and move the box as necessary.


Step 7. Select the part of the image that you want to pop out. You can do this several ways. You can either use the magic wand, the pen tool, the extract filet, etc. etc. I think it is easiest to use the magic wand. Once you have it selected, copy and paste it to a new layer as well. Again, you will not notice any change in the picture, but a new layer will appear with your selection. Do not worry if you get some of the image that is in the picture. When you are done, you won’t be able to notice it.

Step 8. Go back to your picture box layer. Using the magic wand, select the outside of the box. Then move back to the background layer and hit delete. Make sure the background layer is unlocked first.


Step 9. Add a new layer and move it to the background and fill it with a light gradient. I did mine with the foreground 00d2ff and the background 0690df.


Step 10. Add some effects to your background to personalize it even more. Here is my final.


Wednesday, July 25, 2007

Apple Like Photos with reflection

In this tutorial, I will show you how to make an image like the apple homepage (iPhone) with your own pictures.


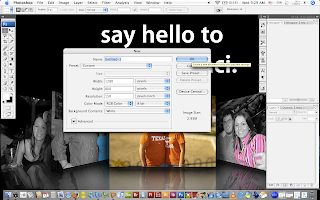
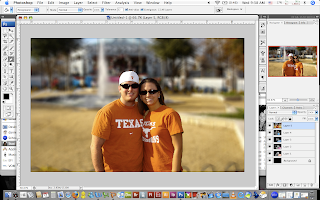
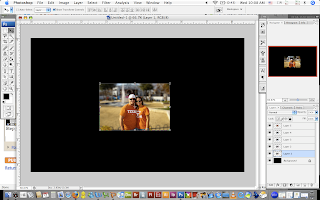
Step 1. Create a new doc in photoshop. My screen resolution in 1280 x 800, so that is what I will be using, but you can create the image in whatever size you would like.


Step 2. Fill the background with black.


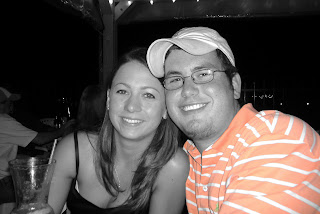
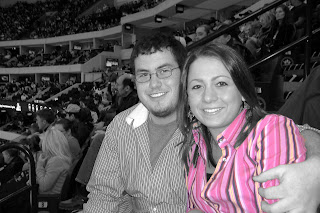
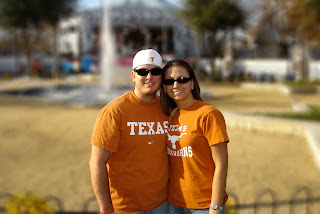
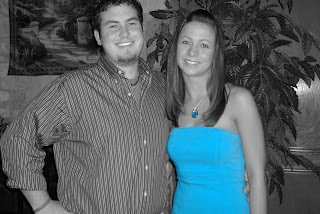
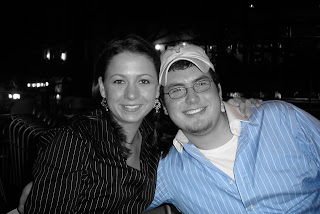
Step 3. Choose 5 of your favorite pictures. I
will be using pictures of my fiance and I. Feel free to use my pictures if you would like.


.


Step 4. Drag and drop your 5 pictures into the new doc you just created. You should end up with your background layer and 5 layers on top of it


Step 5. Use whatever tool you would like to resize all of the pics to the same smaller size. I find it easiest to use the move-tool, but choose whichever you want.


Step 6. Using the move tool, move your images side by side like what I have done.


Step 7. Select your 5 picture layers and group them together. Hit Apple + G (apple) or Cntl + G (windows). Duplicate the group. You should now have three items in your layer pallet (Group 1, Group 1 Copy and Background {in that order}). If they are not in that order, rearrange as necessary.

Step 8. Select Group 1 Copy and go to Edit -> Transform -> Flip Vertical. Then using the move tool, drag the inverted layer below the original pictures like this.


Step 8. Ungroup the two groups. You should now have 11 items in your layers pallet (5 original pics, 5 copied and the background). Select the original and the copied of your first picture. Do this by clicking on the first layer then holding Apple (apple) or cntl (windows) and clicking the copied layer. Then use the perspective tool to give the image a 3-D effect (edit -> transform -> perspective).


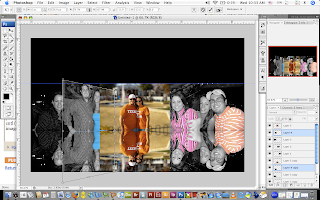
Step 9. Do this for the other three pictures. Keep in mind, the middle image will remain unchanged.


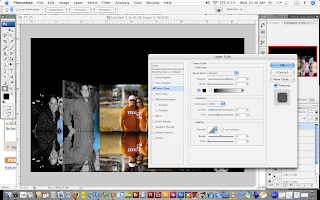
Step 10. Now we need to add an outer glow to enhance that 3-d effect. Start with your middle picture. Double click on the layer and it should open the layer style menu. Select Outer glow and apply the setting below.


Step 11. Do this for all 5 original pictures.

Step 12. Create a new layer below the background layer and fill it with white. Add a layer mask to the black background layer. Using a radial gradient () foreground (black) to transparent, apply the gradient all the way from the top of your screen to the bottom. If you hide the copied layers, you should see something like this...


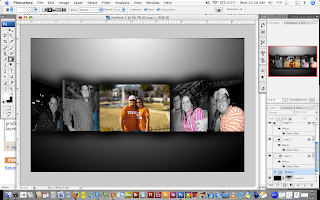
Step 13. Obviously, we don't want to white at the top of our image. We can get rid of it a couple of ways. You can either use the eraser tool or use a brush with white paint to remove it. I think it is easier to just erase it, so that is how I will remove it, but again, choose your weapon of choice. When doing this, make sure you are on the mask and not the image. You will know you are on the mask when there is a small box around the mask instead of the image. Here is what you should see once finished.


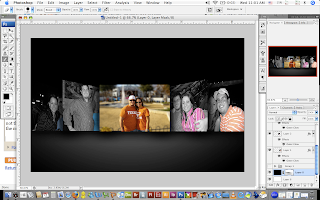
Step 14. Re-group the copied layers. Again apple + g (apple) or cntl + g (windows). Apply a layer mask to the group. Again using the gradient tool, but this time switch it back from radial to linear. Still using foreground (black) to transparent, apply a small gradient (make sure you are on the mask). Start at the bottom of the screen and go up to just below your original images. You may have to apply the gradient a few times to get the look you want. Here is what mine came out like.


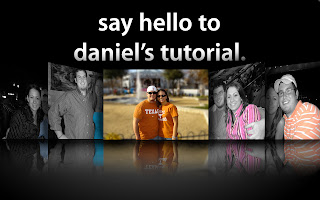
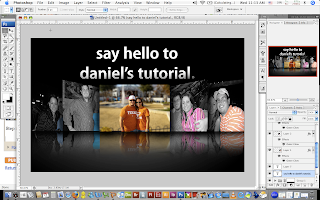
Step 15. Add a catchy "apple-like" saying. I used myriad apple for my font.